Best Home Fermentation Equipment 2026: Beer, Wine, Kombucha
FTC Disclosure: This article contains affiliate links. If you purchase through our links, we may earn a commission at no additional cost to you.
If you brew beer, wine, mead, or kombucha at home, you're using the same fundamental gear: a vessel, a way to hold temperature, a way to measure progress, and a way to keep everything clean. Marketing tries to sell you twelve different "specialized" setups for each fermentation - the truth is, most of the kit overlaps almost completely.
Free: The First Brew Blueprint: 5-Gallon Amber Ale, Start to Sip
4 weeks from grain to glass
Across all four fermentations, here are the items worth paying for and the categories you can absolutely cheap out on.
Temperature Control (The Single Most Important Tool)
No spam. Unsubscribe anytime.
Yeast and SCOBYs are picky. Ale yeast wants 65-70F. Lager yeast wants 50-55F. Kombucha SCOBY wants 75-82F. Wine yeast tolerates a wider range but rewards stability. If your basement swings from 58F at night to 74F by afternoon, every fermentation in your house tastes like its worst self.
Best Controller for Any Fermentation
The Inkbird ITC-308 Digital Temperature Controller is the universal answer. Plug it into a wall outlet, plug a heater or cooler into the controller, and tape the probe to your fermenter. About $35, two outlets (heat + cool), 0.1F precision, and it does exactly one job extremely well.
Heating for Cold Spaces
If your fermenter lives in a cold garage, basement, or unheated room, pair the Inkbird with a carboy heating wrap with thermostat. The wrap straps to the outside of any 1- to 7-gallon vessel and heats just enough to hold setpoint without scorching the yeast. This combination works for ale fermentation, kombucha SCOBY, mead, and primary wine fermentation.
Cooling for Warm Spaces
For lagers or anyone in a warm climate: pick up a used mini-fridge on Craigslist for $50-100, plug it into the cooling outlet on the Inkbird, and you have a fermentation chamber rated for 35F to 75F. This is the most expensive route, but it transforms what styles you can brew.
Vessels (Pick by Volume, Not Material)
The fermenter debate (plastic vs glass vs stainless) gets way too much oxygen on forums. Here's the short version:
Plastic Buckets: Cheap, Forgiving, Best Default
For beer, kombucha, and short-fermentation wine, a 6.5-gallon fermenting bucket with lid and airlock is the right answer. About $33, opaque (UV-protective), light, and easy to clean. Replace every 5 years if you scratch the interior. Don't use bleach-cleaned buckets - they retain chlorine that ruins flavor.
Glass Carboys: For Long Bulk Aging
If you're bulk-aging a barleywine, a sour beer, or a country wine for 6+ months, a 5- or 6-gallon glass carboy is worth the weight. UV-block them in a closet, never let them sit empty (the airlock dries out and oxygen creeps in), and use a carboy carrier - dropping one full of beer is a nightmare you only get to have once.
Stainless Conical Fermenters: Worth It Around Batch 20
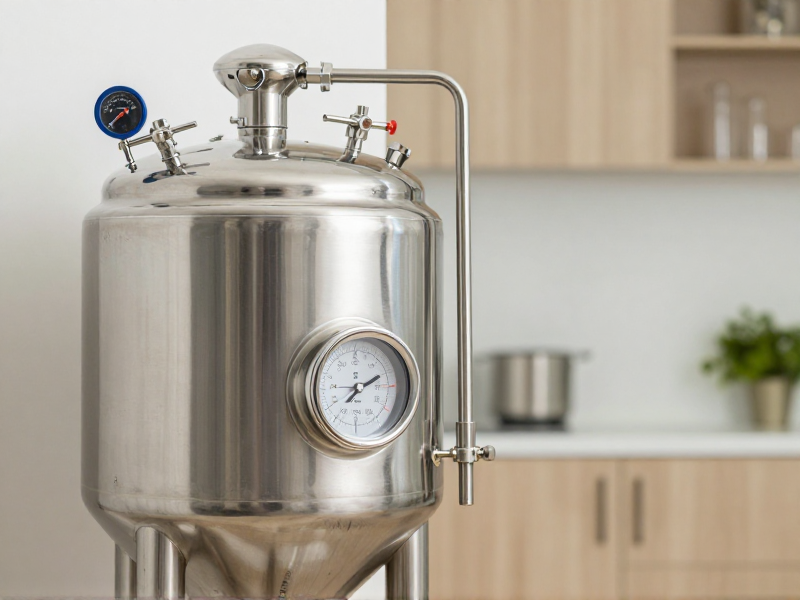
Once you're brewing monthly, a stainless conical fermenter earns its keep. You can dump trub and harvest yeast from the cone, it cleans in 5 minutes versus 25 for a glass carboy, and the airtight seal makes pressure fermentation possible. Not for beginners, mandatory for serious hobbyists.
Special Case: Kombucha Vessels
Kombucha SCOBYs want oxygen during primary fermentation. Skip the airlock for primary - use a wide-mouth glass jar (1-2 gallon) covered with breathable cloth and a rubber band. Only after primary, when you bottle for secondary carbonation, do you need pressure-rated glass.
Sanitation (Don't Cheap Out Here)
Star San: The Default Answer
Five Star Star San is no-rinse, food-safe, kills bacteria and wild yeast in 60 seconds, and a 32oz concentrate bottle lasts about a year of weekly brewing. Use 1 oz per 5 gallons of water, apply by spray bottle for surfaces or by submersion for fermenters. The foam is harmless - "don't fear the foam" is the homebrew mantra.
PBW or Equivalent for Cleaning
Star San sanitizes, it does not clean. For caked-on trub, beer stone, or kombucha residue, use a Powdered Brewery Wash (PBW) in liquid or tablet form. It dissolves protein and mineral residue without scrubbing. Rinse with water, then sanitize with Star San.
Campden Tablets for Wine/Cider Brewers
If you're working with fresh fruit or unpasteurized juice, Campden tablets (potassium metabisulfite) suppress wild yeast for 24 hours before pitching your chosen strain. Skip them and you'll get unpredictable fermentation from whatever was floating on the fruit.
Measurement (You Can't Improve What You Don't Measure)
Hydrometer: Buy First, Use Always
A Brewers Elite hydrometer and test jar set is $22 and absolutely required. It tells you starting gravity (potential alcohol), final gravity (when fermentation is done), and lets you calculate ABV. Test before pitching, test before bottling, never bottle until the gravity is stable for 3 days running.
Refractometer: A Brew-Day Upgrade
A digital ATC refractometer takes a 2-drop sample and gives you Brix readings in 10 seconds. Great for monitoring mash and pre-boil gravity - terrible for finished beer (alcohol skews the reading). Keep the hydrometer for final gravity.
pH Meter: For Brew-Day Mash Adjustment
Reading mash pH lets you optimize enzyme conversion (beer) or adjust acidity (kombucha, wine). For most beginners, this is batch-20 territory. When you're ready, the Apera PH700 benchtop is the professional standard - 0.01 pH accuracy, auto-calibration, lab-grade. The Milwaukee PH55 PRO handheld is the popular field option.
Yeast and Cultures
Beer: Dry vs Liquid
Dry yeast is more forgiving and cheaper for beginners. Danstar BRY-97 American West Coast Ale Yeast is a stellar default for IPAs, pale ales, and ambers - clean fermentation, fast finish, $5 per packet. Liquid yeast unlocks specialty styles but demands refrigeration and faster pitching.
Wine: Match the Yeast to the Style
EC-1118 (Champagne yeast) is the universal "ferments anything to dry" pick. Premier Cuvée handles high gravity. RC-212 brings out red wine character. Buy fresh, use within 6 months.
Kombucha: Just Use a SCOBY
A healthy SCOBY (Symbiotic Culture Of Bacteria and Yeast) plus 1 cup of starter tea from a previous batch is all you need. Skip the dehydrated SCOBY products - get one from a friend or a fresh online source.
What You Don't Need (Yet)
- Oxygen injection systems. Splash-aerate by pouring wort hard from a height. It works for batches 1-50.
- Plate chillers, counterflow chillers. A 25-foot copper immersion wort chiller cools 5 gallons in under 20 minutes for $50.
- Brew controllers (Grainfather, Brewzilla, etc.). Beautiful, expensive. Propane and a kettle teach you more.
- Stir plates for yeast starters. Not needed for batches under 1.080 gravity with dry yeast.
Bottom Line
The five-item core kit that works across beer, wine, mead, and kombucha: an Inkbird ITC-308 controller, a 6.5-gallon plastic fermenter, a hydrometer set, Star San sanitizer, and a heating wrap. About $175 total, brewable for years.
When you outgrow that, the upgrade path is: stainless conical, refractometer, pH meter, fermentation chamber. Not all at once - one per year as your batches earn it.
This article was last reviewed on May 13, 2026.
Affiliate Disclosure
Discussion
Sign in with GitHub to leave a comment. Your replies are stored on this site's public discussion board.